How to use Holograph
Holograph is a platform for you to create, deploy, mint, and sell multi-chain NFTs. But more importantly, all Holographic assets can transferred across various chains with zero data loss. Anyone can create a multi-chain NFT collection on Holograph for free with just a few simple steps. In this article, we’ll discuss how to use Holograph to create an NFT collection across different chains and how to bridge it. While it supports numerous networks, we’ll be taking the example of a transfer between Polygon and Avalanche in this tutorial. Make sure you have sufficient gas fees in these networks before getting started. Step 1: Head over to Holograph’s website at https://app.holograph.xyz/ and click on the menu given in the top right corner. Click on ‘Connect Wallet’ and choose any wallet of your liking. Step 2: Once the wallet has been connected and you’ve chosen a network to start with, you’ll land on this screen with a ‘create collection’ button. Click on it. To create a collection, you’ll have to fill in necessary details like the name of the collection, its symbol, token type, royalty percentage you want to keep, etc. Step 3: After that, you can proceed to create an NFT for this collection. Use any AI-generated image as an example if you don’t have your own art yet. Again, you’ll be asked to fill in details like the name of the NFT, the name of the creator, its description, etc. Step 4: Now deploy the NFT you created to the networks you selected initially — Polygon and Avalanche in this case. Start with any one of the two networks, and then proceed to do the same for the other one. You can check if it was done successfully by going to the ‘collections’ tab. Step 5: Now we’ll finally get to the bridging part. You’ll find a ‘bridge’ option right beside the ‘create’ one that we used earlier. Click on that. Select the NFT that you created earlier or any other you may have that you’d like to bridge. The networks you deployed it on earlier will be selected automatically and you’ll just have to confirm by clicking ‘bridge.’ And that’s all! You’ve successfully created a collection and also bridged it across two networks in just 5 steps. The status of your bridge transactions can be tracked in the ‘Bridge Explorer’ tab on the same page. Holograph is compatible with multiple chains like Ethereum, Polygon, Avalanche, BNB Chain, Optimism, Arbitrum, Mantle, and Zora. So you can deploy and bridge your NFTs on any one of these.
Holograph is a platform for you to create, deploy, mint, and sell multi-chain NFTs. But more importantly, all Holographic assets can transferred across various chains with zero data loss. Anyone can create a multi-chain NFT collection on Holograph for free with just a few simple steps. In this article, we’ll discuss how to use Holograph to create an NFT collection across different chains and how to bridge it. While it supports numerous networks, we’ll be taking the example of a transfer between Polygon and Avalanche in this tutorial. Make sure you have sufficient gas fees in these networks before getting started. Step 1: Head over to Holograph’s website at https://app.holograph.xyz/ and click on the menu given in the top right corner. Click on ‘Connect Wallet’ and choose any wallet of your liking. Step 2: Once the wallet has been connected and you’ve chosen a network to start with, you’ll land on this screen with a ‘create collection’ button. Click on it. To create a collection, you’ll have to fill in necessary details like the name of the collection, its symbol, token type, royalty percentage you want to keep, etc. Step 3: After that, you can proceed to create an NFT for this collection. Use any AI-generated image as an example if you don’t have your own art yet. Again, you’ll be asked to fill in details like the name of the NFT, the name of the creator, its description, etc. Step 4: Now deploy the NFT you created to the networks you selected initially — Polygon and Avalanche in this case. Start with any one of the two networks, and then proceed to do the same for the other one. You can check if it was done successfully by going to the ‘collections’ tab. Step 5: Now we’ll finally get to the bridging part. You’ll find a ‘bridge’ option right beside the ‘create’ one that we used earlier. Click on that. Select the NFT that you created earlier or any other you may have that you’d like to bridge. The networks you deployed it on earlier will be selected automatically and you’ll just have to confirm by clicking ‘bridge.’ And that’s all! You’ve successfully created a collection and also bridged it across two networks in just 5 steps. The status of your bridge transactions can be tracked in the ‘Bridge Explorer’ tab on the same page. Holograph is compatible with multiple chains like Ethereum, Polygon, Avalanche, BNB Chain, Optimism, Arbitrum, Mantle, and Zora. So you can deploy and bridge your NFTs on any one of these.
This article is authored by an independent contributor.
smolloop
Share
Holograph is a platform for you to create, deploy, mint, and sell multi-chain NFTs. But more importantly, all Holographic assets can transferred across various chains with zero data loss. Anyone can create a multi-chain NFT collection on Holograph for free with just a few simple steps.
In this article, we’ll discuss how to use Holograph to create an NFT collection across different chains and how to bridge it. While it supports numerous networks, we’ll be taking the example of a transfer between Polygon and Avalanche in this tutorial. Make sure you have sufficient gas fees in these networks before getting started.
Step 1: Head over to Holograph’s website at https://app.holograph.xyz/ and click on the menu given in the top right corner. Click on ‘Connect Wallet’ and choose any wallet of your liking.
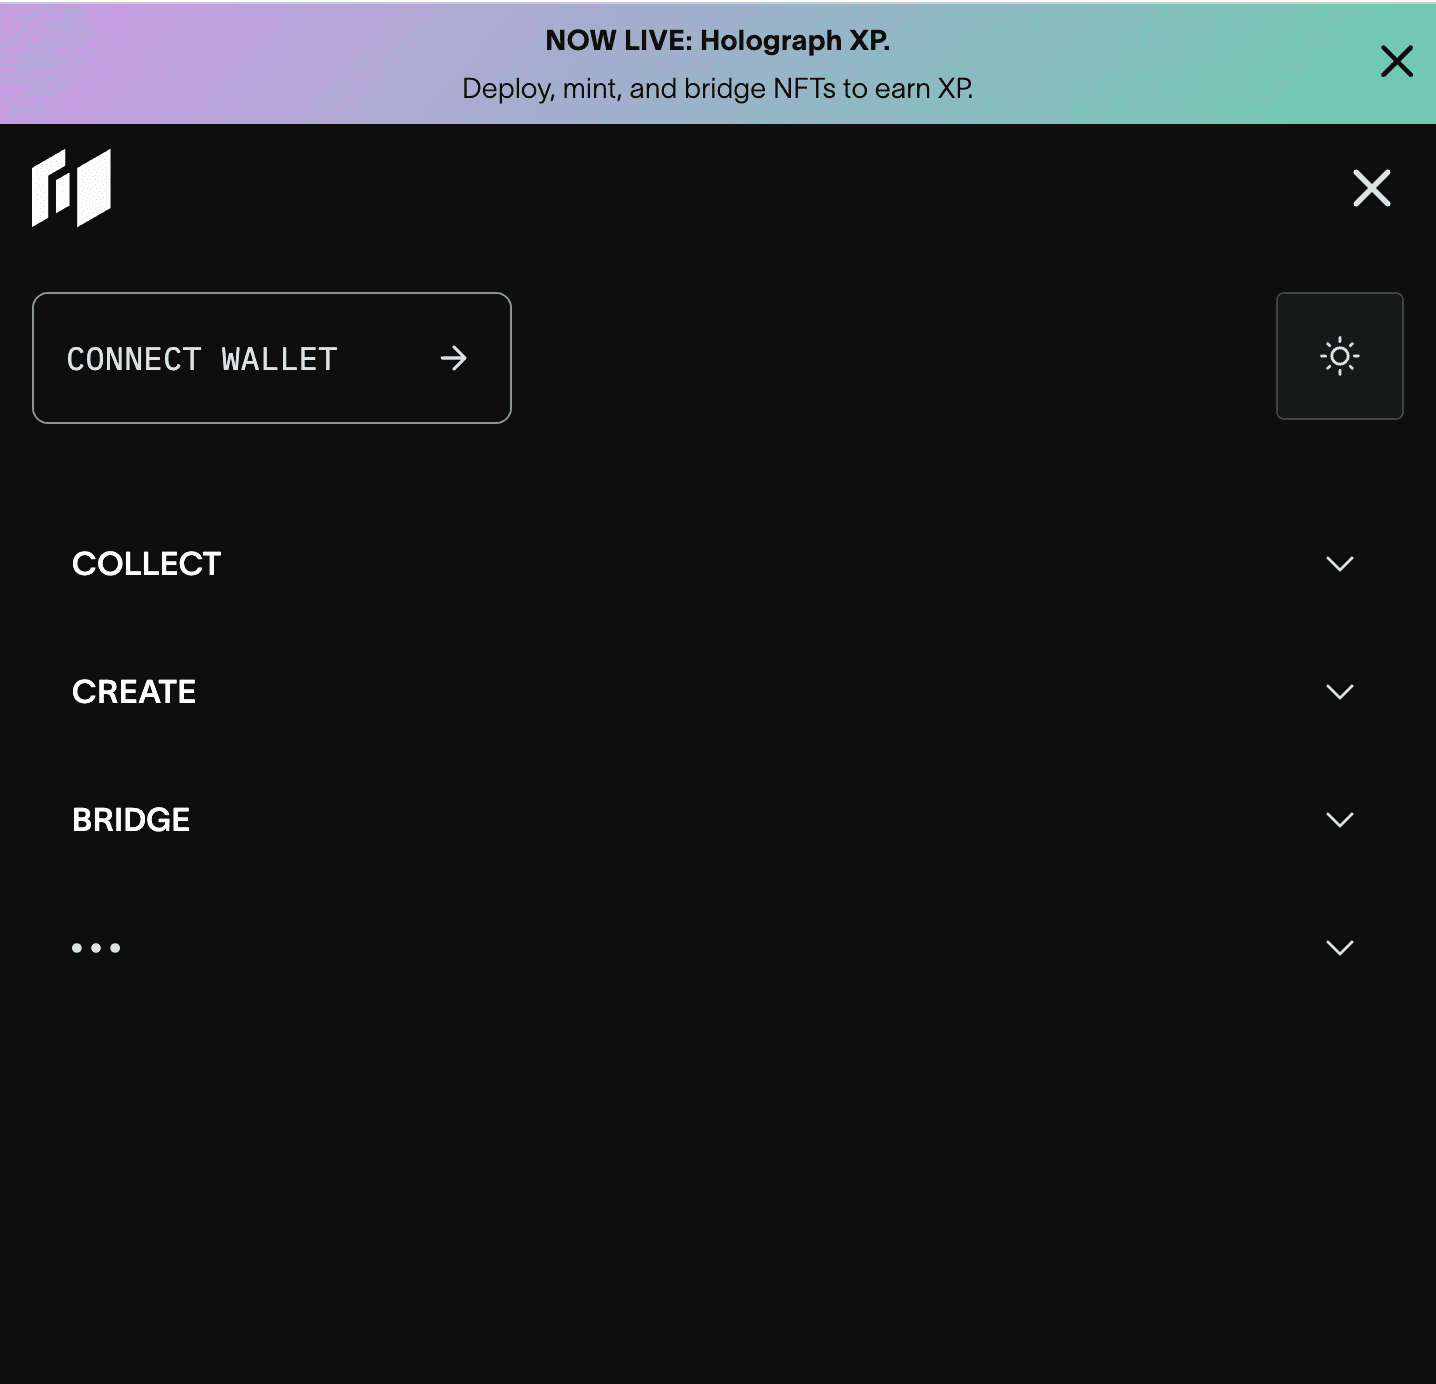
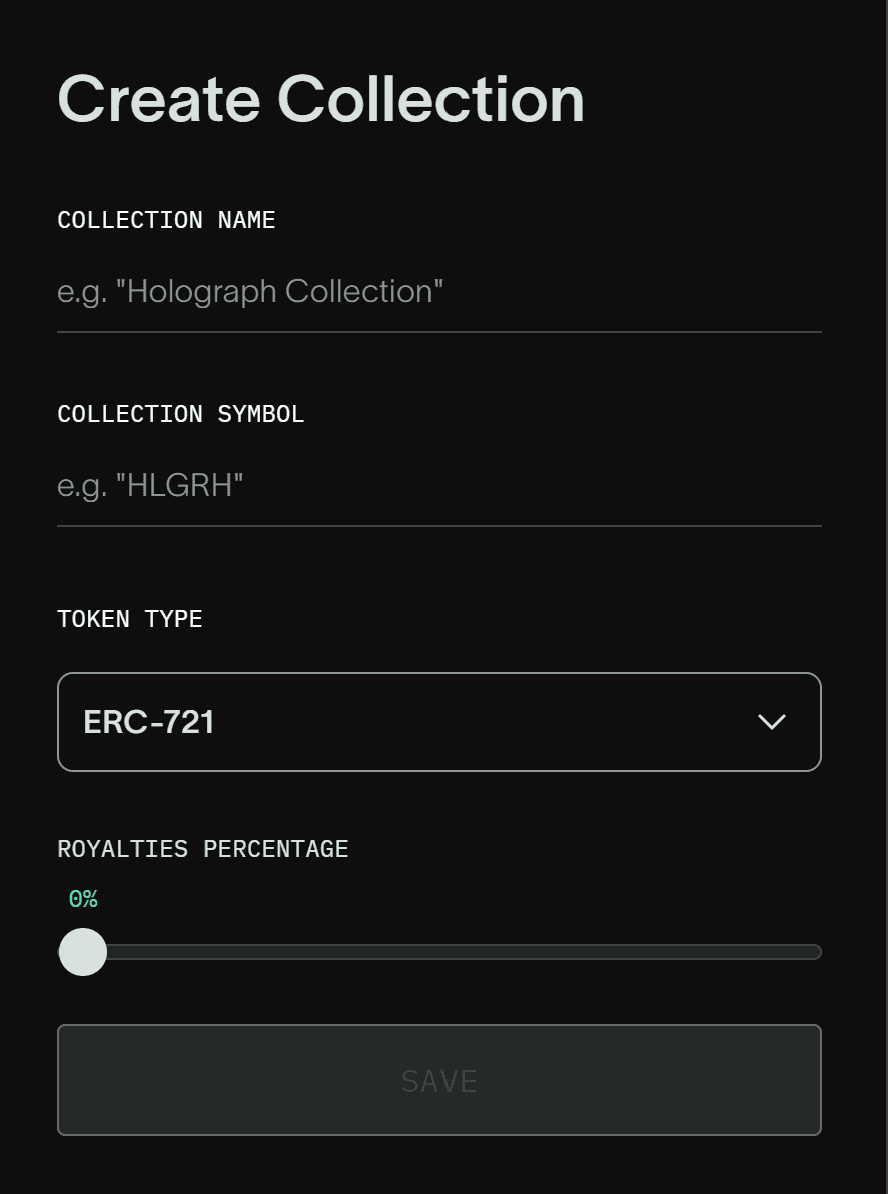
Step 2: Once the wallet has been connected and you’ve chosen a network to start with, you’ll land on this screen with a ‘create collection’ button. Click on it.

To create a collection, you’ll have to fill in necessary details like the name of the collection, its symbol, token type, royalty percentage you want to keep, etc.
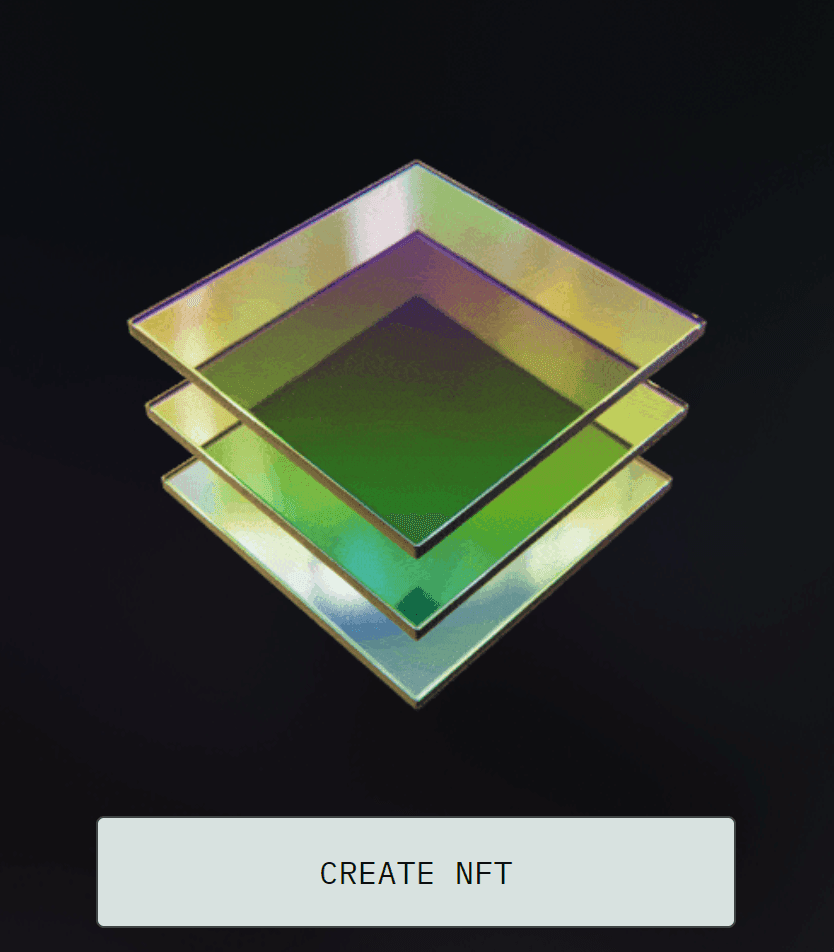
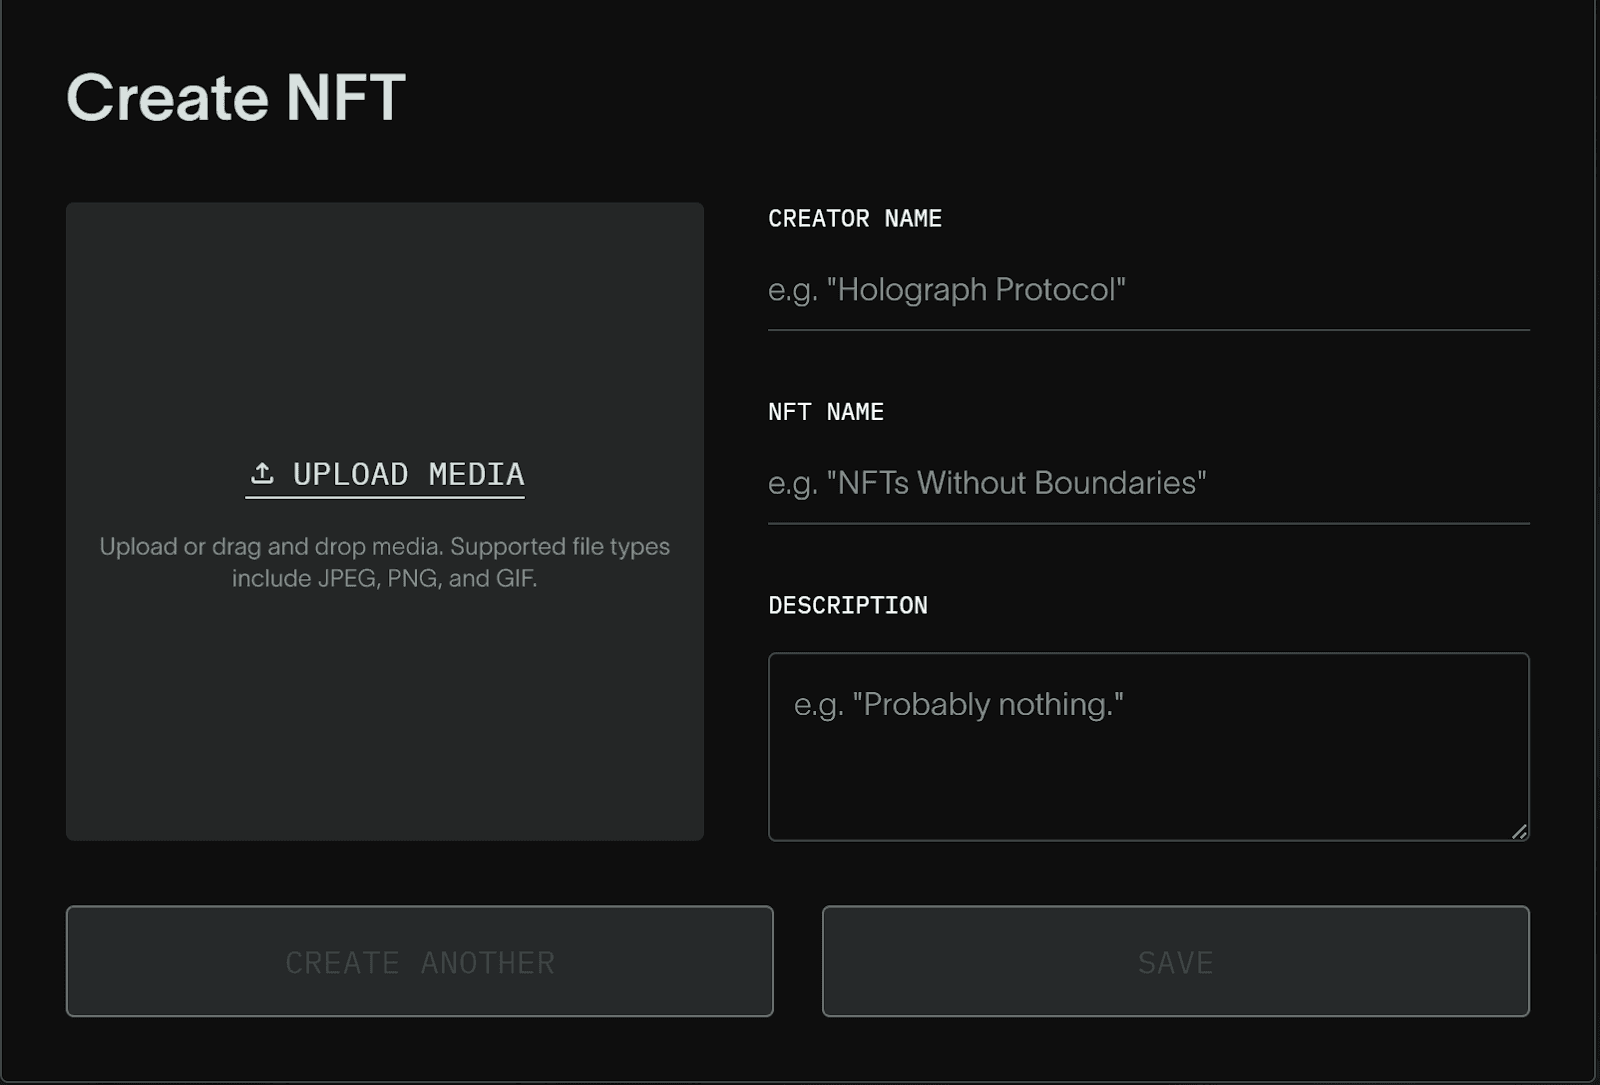
Step 3: After that, you can proceed to create an NFT for this collection. Use any AI-generated image as an example if you don’t have your own art yet.
Again, you’ll be asked to fill in details like the name of the NFT, the name of the creator, its description, etc.
Step 4: Now deploy the NFT you created to the networks you selected initially — Polygon and Avalanche in this case.
Start with any one of the two networks,
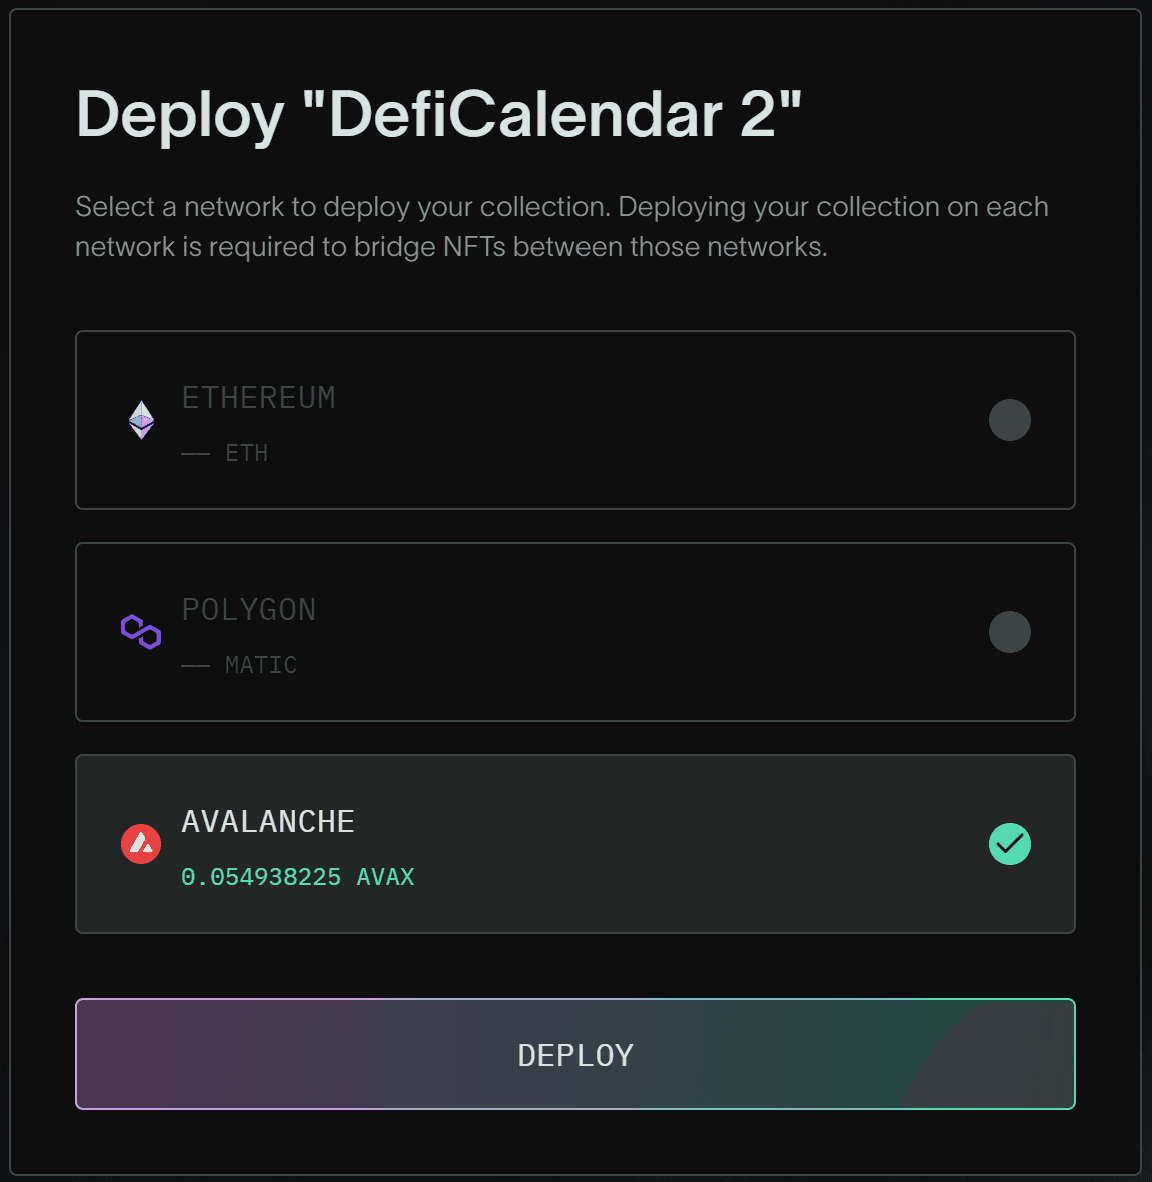
and then proceed to do the same for the other one.
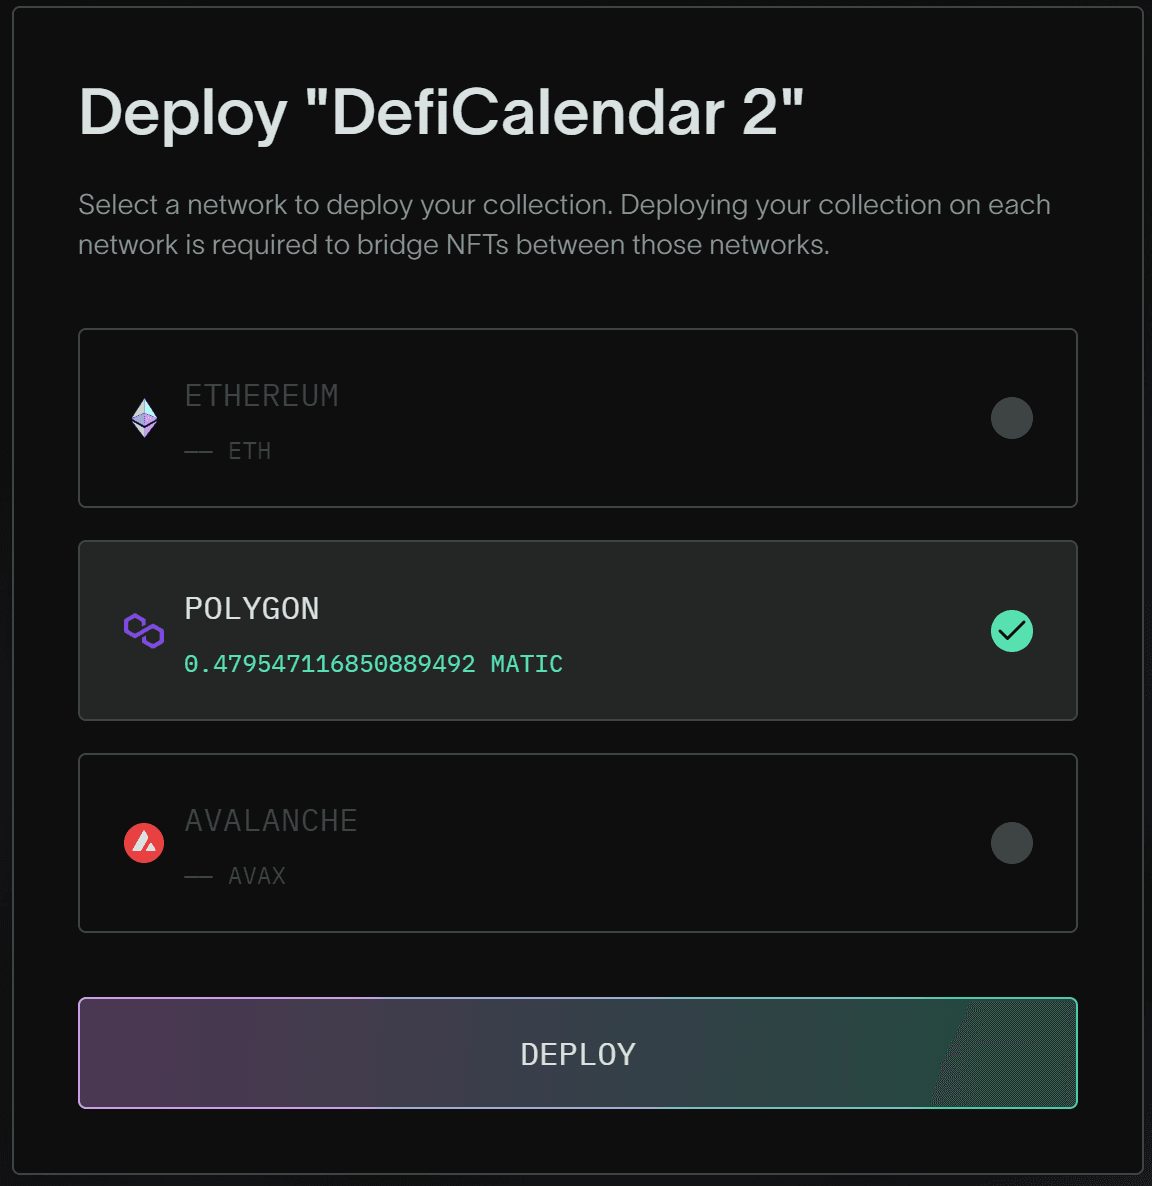
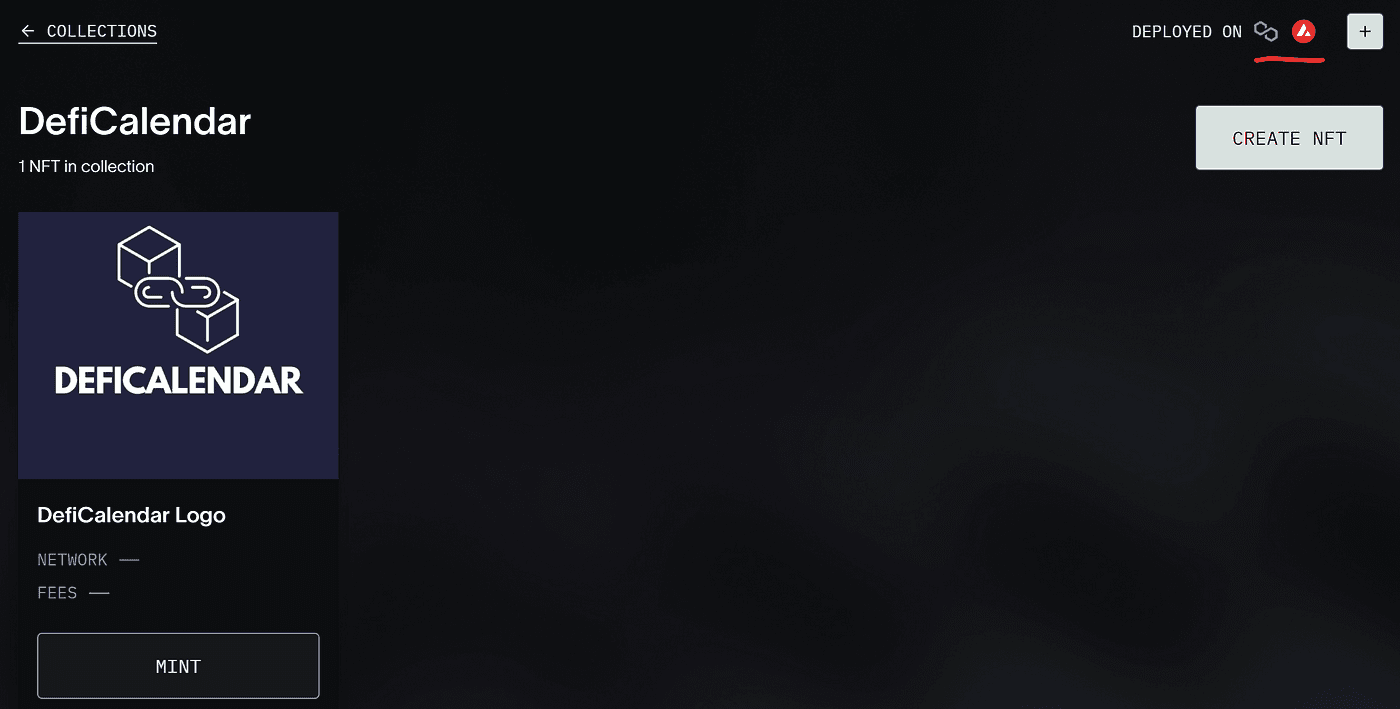
You can check if it was done successfully by going to the ‘collections’ tab.
Step 5: Now we’ll finally get to the bridging part. You’ll find a ‘bridge’ option right beside the ‘create’ one that we used earlier. Click on that.
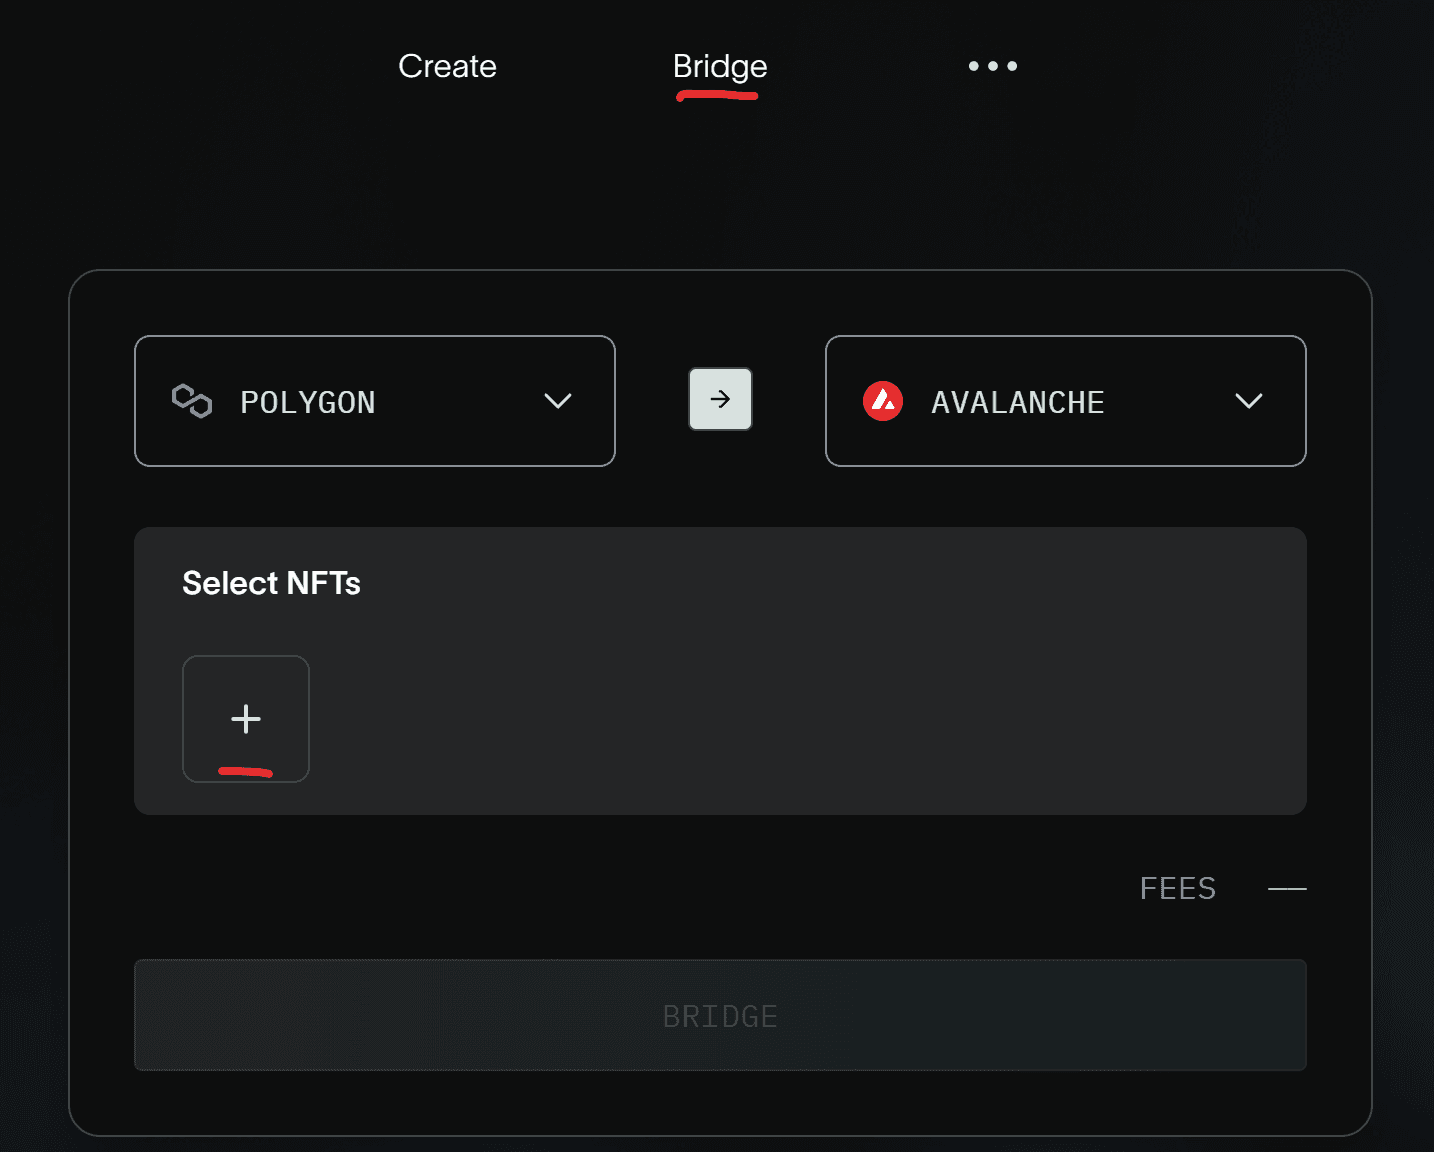
Select the NFT that you created earlier or any other you may have that you’d like to bridge.
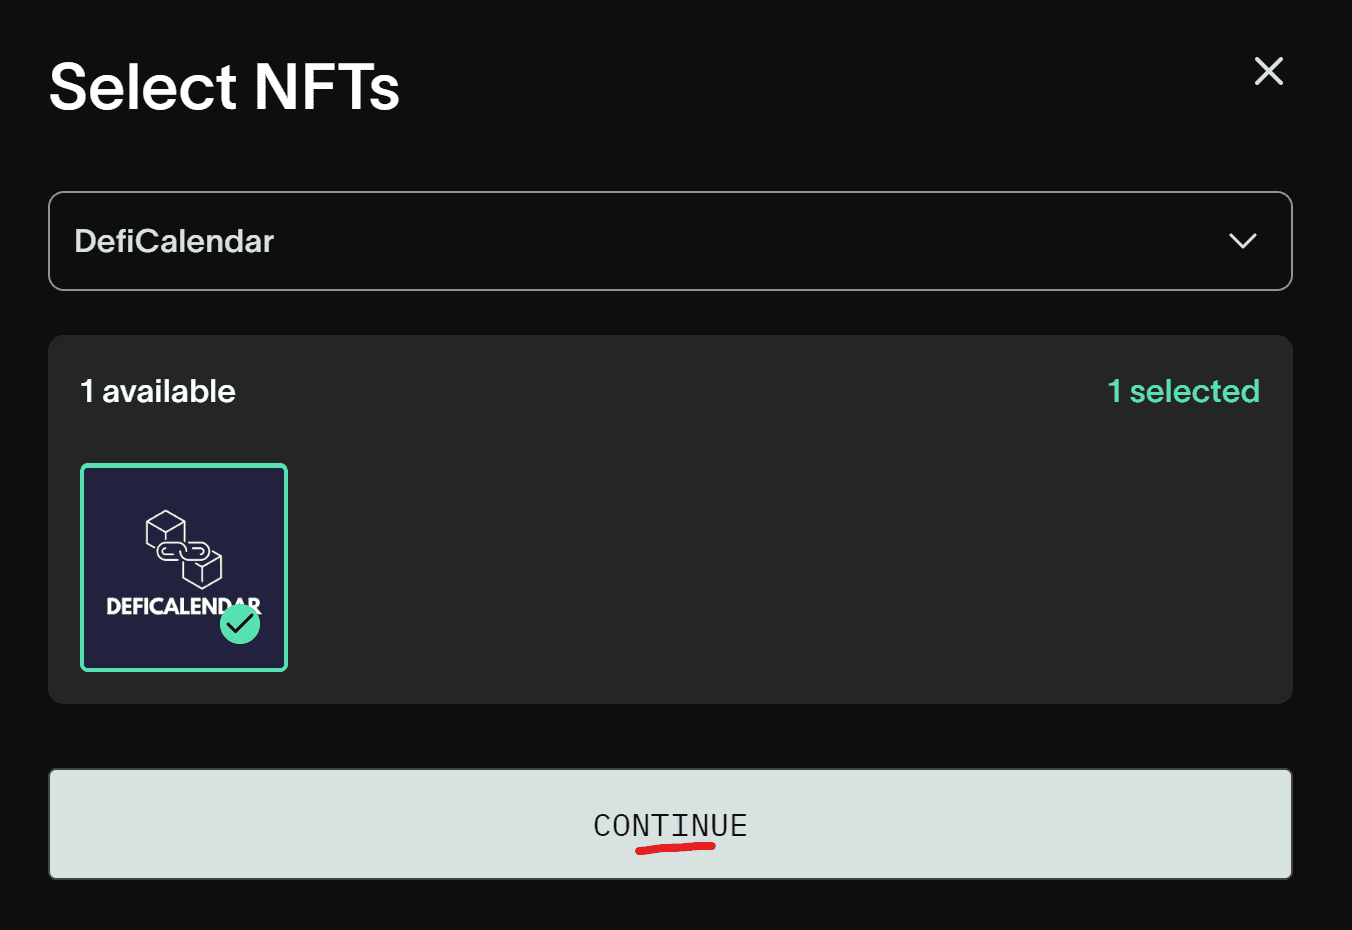
The networks you deployed it on earlier will be selected automatically and you’ll just have to confirm by clicking ‘bridge.’
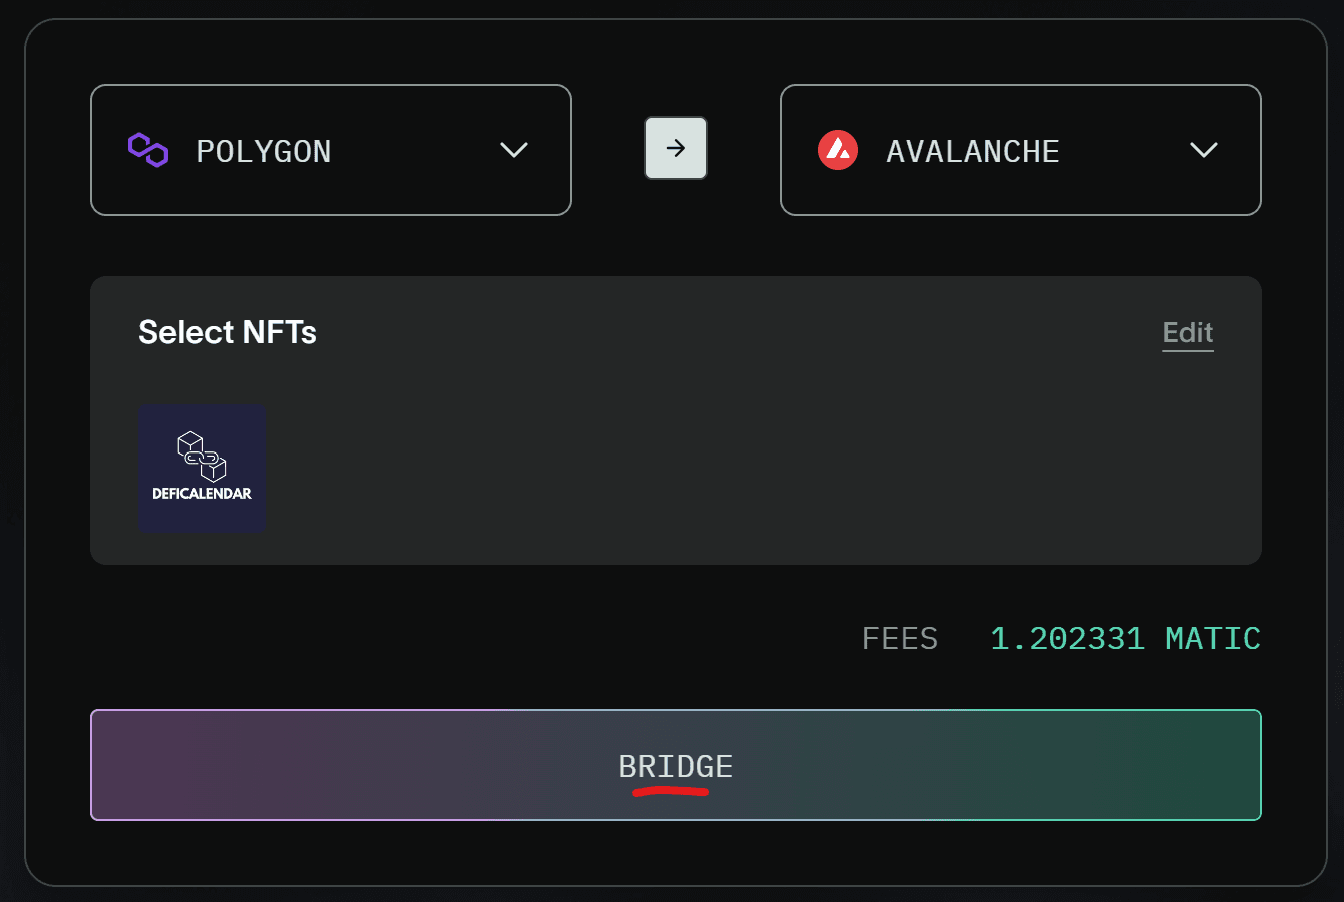
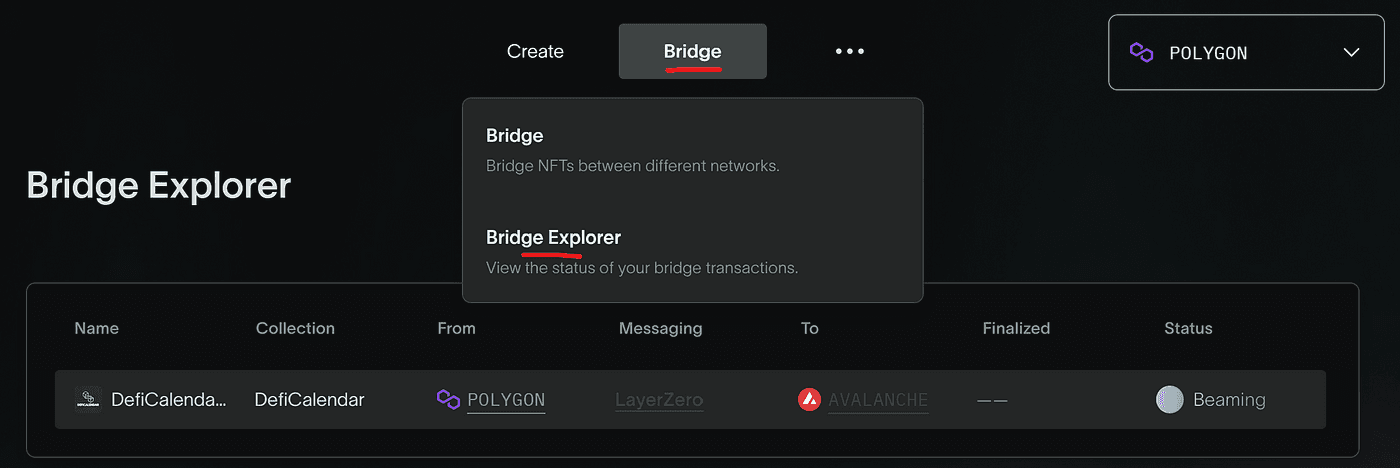
And that’s all! You’ve successfully created a collection and also bridged it across two networks in just 5 steps. The status of your bridge transactions can be tracked in the ‘Bridge Explorer’ tab on the same page.
Holograph is compatible with multiple chains like Ethereum, Polygon, Avalanche, BNB Chain, Optimism, Arbitrum, Mantle, and Zora. So you can deploy and bridge your NFTs on any one of these.
Recommended by Pluid
Tutorials
by SMooTH
Tutorials
Jul 23, 2025

Tutorials
by SMooTH
Tutorials
Aug 28, 2025

Tutorials
by SMooTH
Tutorials
Aug 2, 2025

Tutorials
by SMooTH
Tutorials
Sep 15, 2025
